Register update
The following tutorial only applies to organizations that use yearly registration of documents (document Register form field "Registration year" is specified). If your organization does not use yearly registration for documents, you do not need to perform register update and this tutorial can be skipped.
Registers need to be updated for all documents that use yearly registration. The update process is quick and easy, but it must be done every year. Otherwise, the old registers will stop functioning when a new year begins and new documents will not be automatically registered into the system.
Users that have the assigned role "Company Setup administrator" can access and update registers. Instructions on how to update the registers are detailed in chapter 1 of this tutorial.
To delegate the task of register update to a responsible person or persons, the employees will have to be given access to the Registers window by a user who has the role "Company contacts administrator". Instructions on how to grant access to the Registers window (creation and assignment of a security group) are detailed in chapter 2 of this tutorial.
This tutorial was written in 2021 in preparation of the end of year register update for 2022. All examples given in the tutorial are given for register update from 2021 -> 2022, but are valid for any following year.
1. Update of registers.
This chapter describes the task of creating new registers for all document groups that use yearly registration. You will be creating copies of currently in use registers and editing the copies.
When performing the actions described below, be careful to not edit the fields in the currently in use (original) register forms. Only edit the fields in the copied register forms.
1.1. Navigate to Register window.
1.1.1. Click on the ![]() module in the left-hand side menu of the Vecticum app. The administration module will open.
module in the left-hand side menu of the Vecticum app. The administration module will open.
1.1.2. If you have access to only one feature of the administration module, the ![]() window will be open automatically. If you have access to other administration module features, you will need to click on
window will be open automatically. If you have access to other administration module features, you will need to click on ![]() in the left-hand side menu for the
in the left-hand side menu for the ![]() window to open.
window to open.
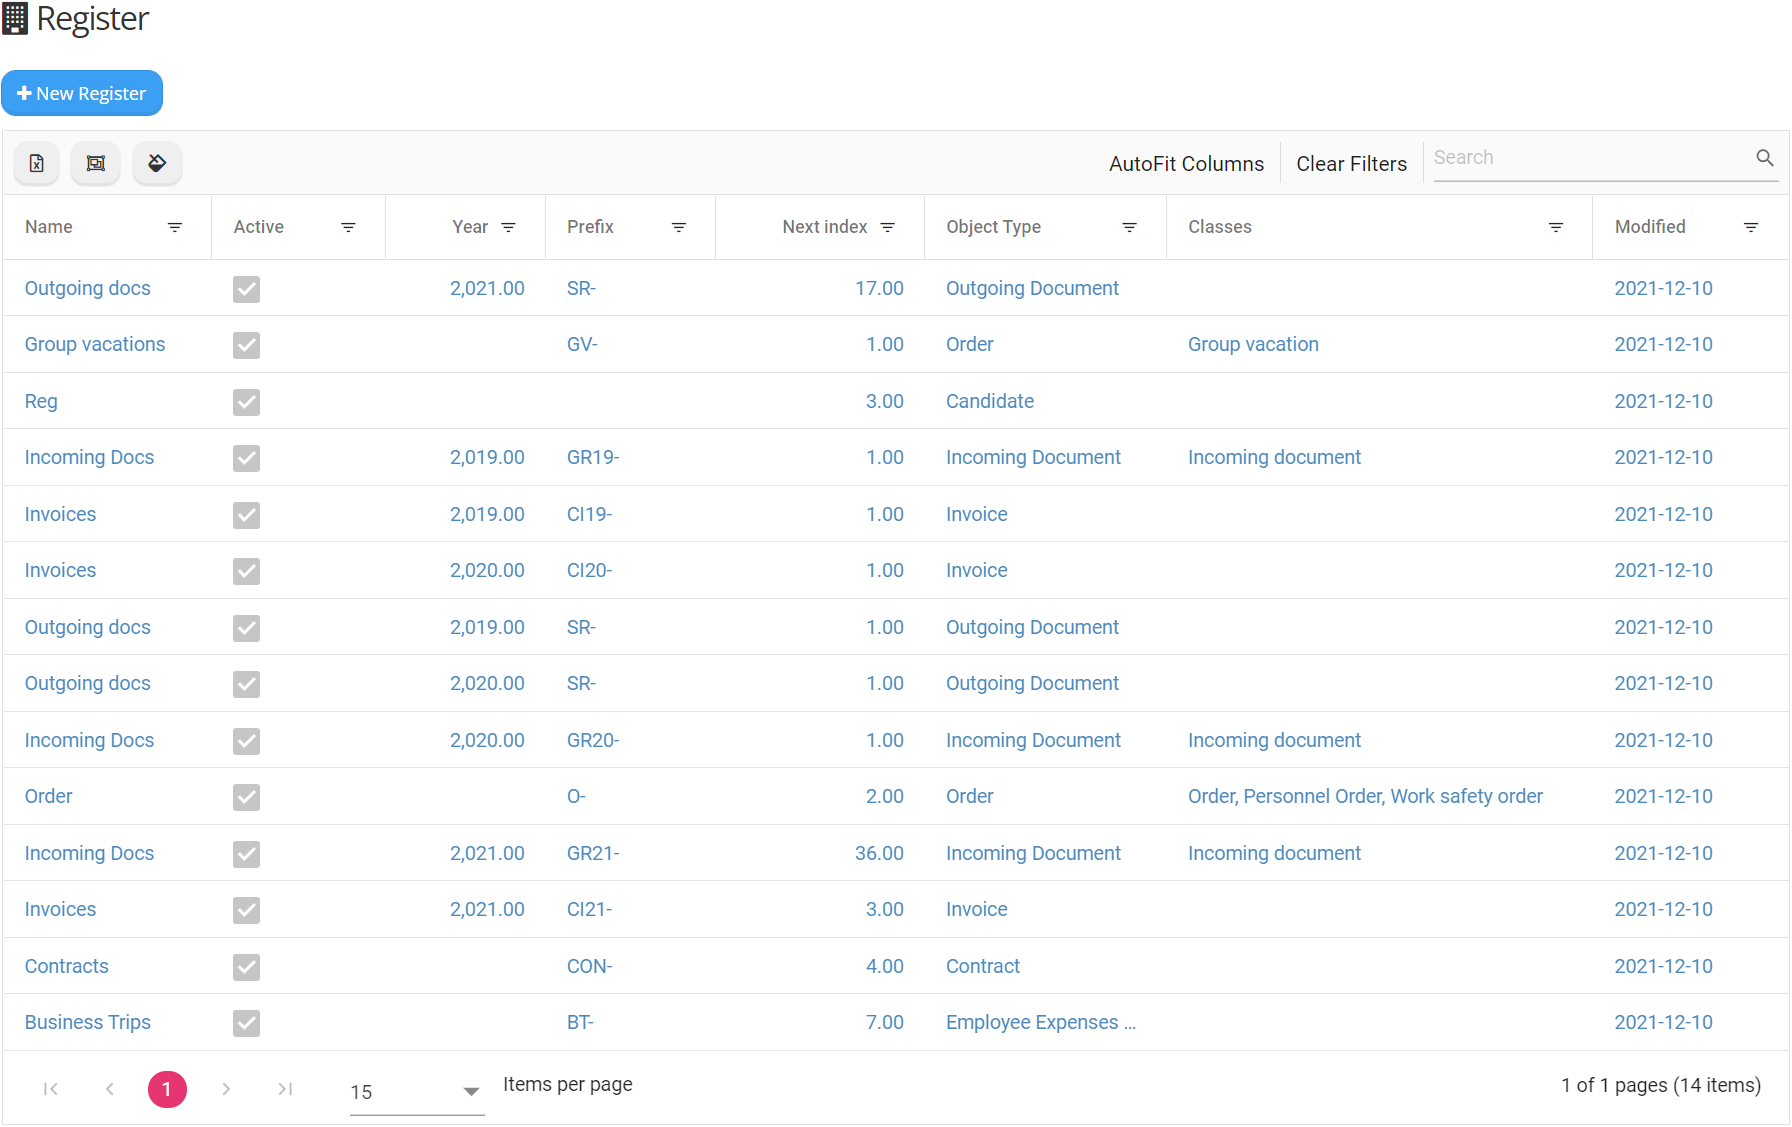
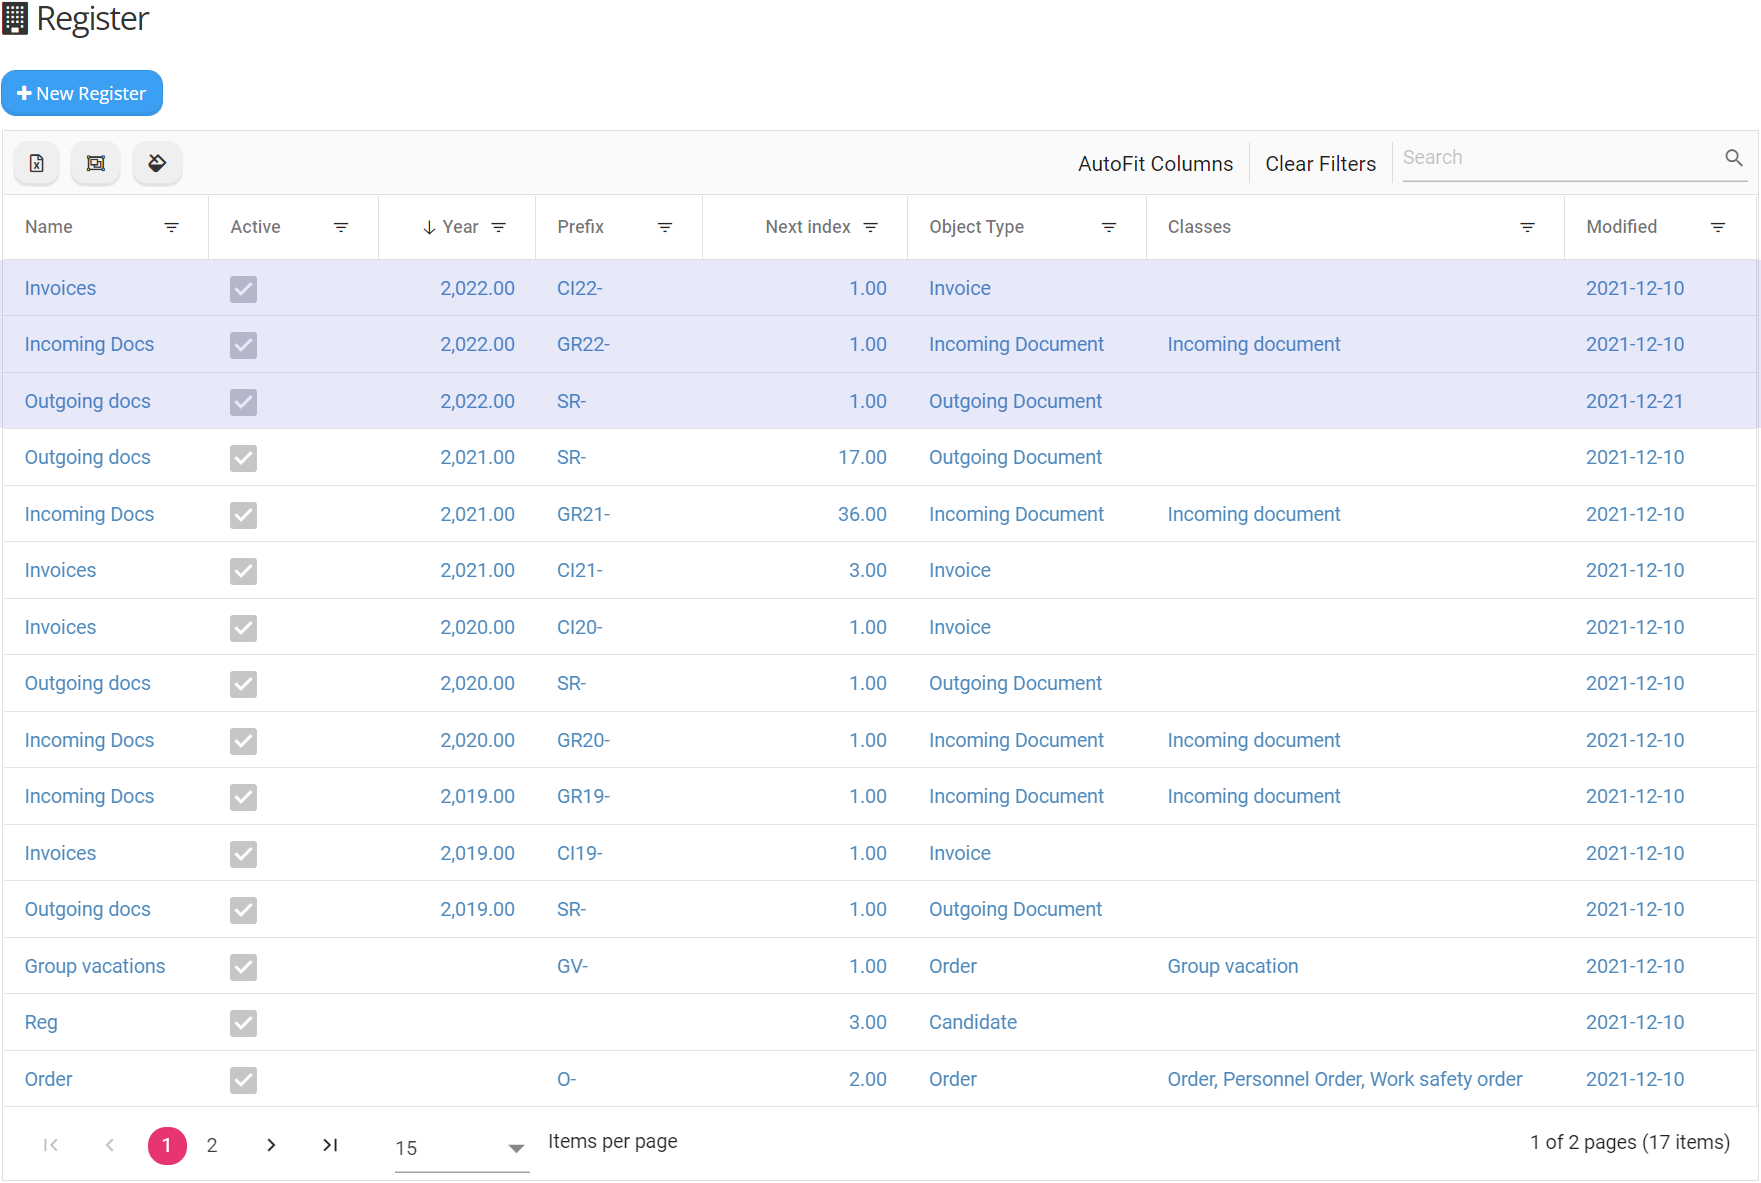
1.1.3. Your organizations registers list will be shown in the window. Here you will be able to create and modify registers. An example Register window is presented below (Fig. 1).
1.2. Identify registers that require an update.
1.2.1. Before start of a new year, registers need to be updated for all documents that have an assigned registration year.
1.2.2. Document registers that have an assigned registration year can be easily filtered in the list. Click on the Year column header until the arrow points down ( ). The list will be sorted by year, from newest to oldest. Now registers that have an assigned year can be seen at the top of the list (Fig. 2, highlighted rows show registers with registration year 2021).
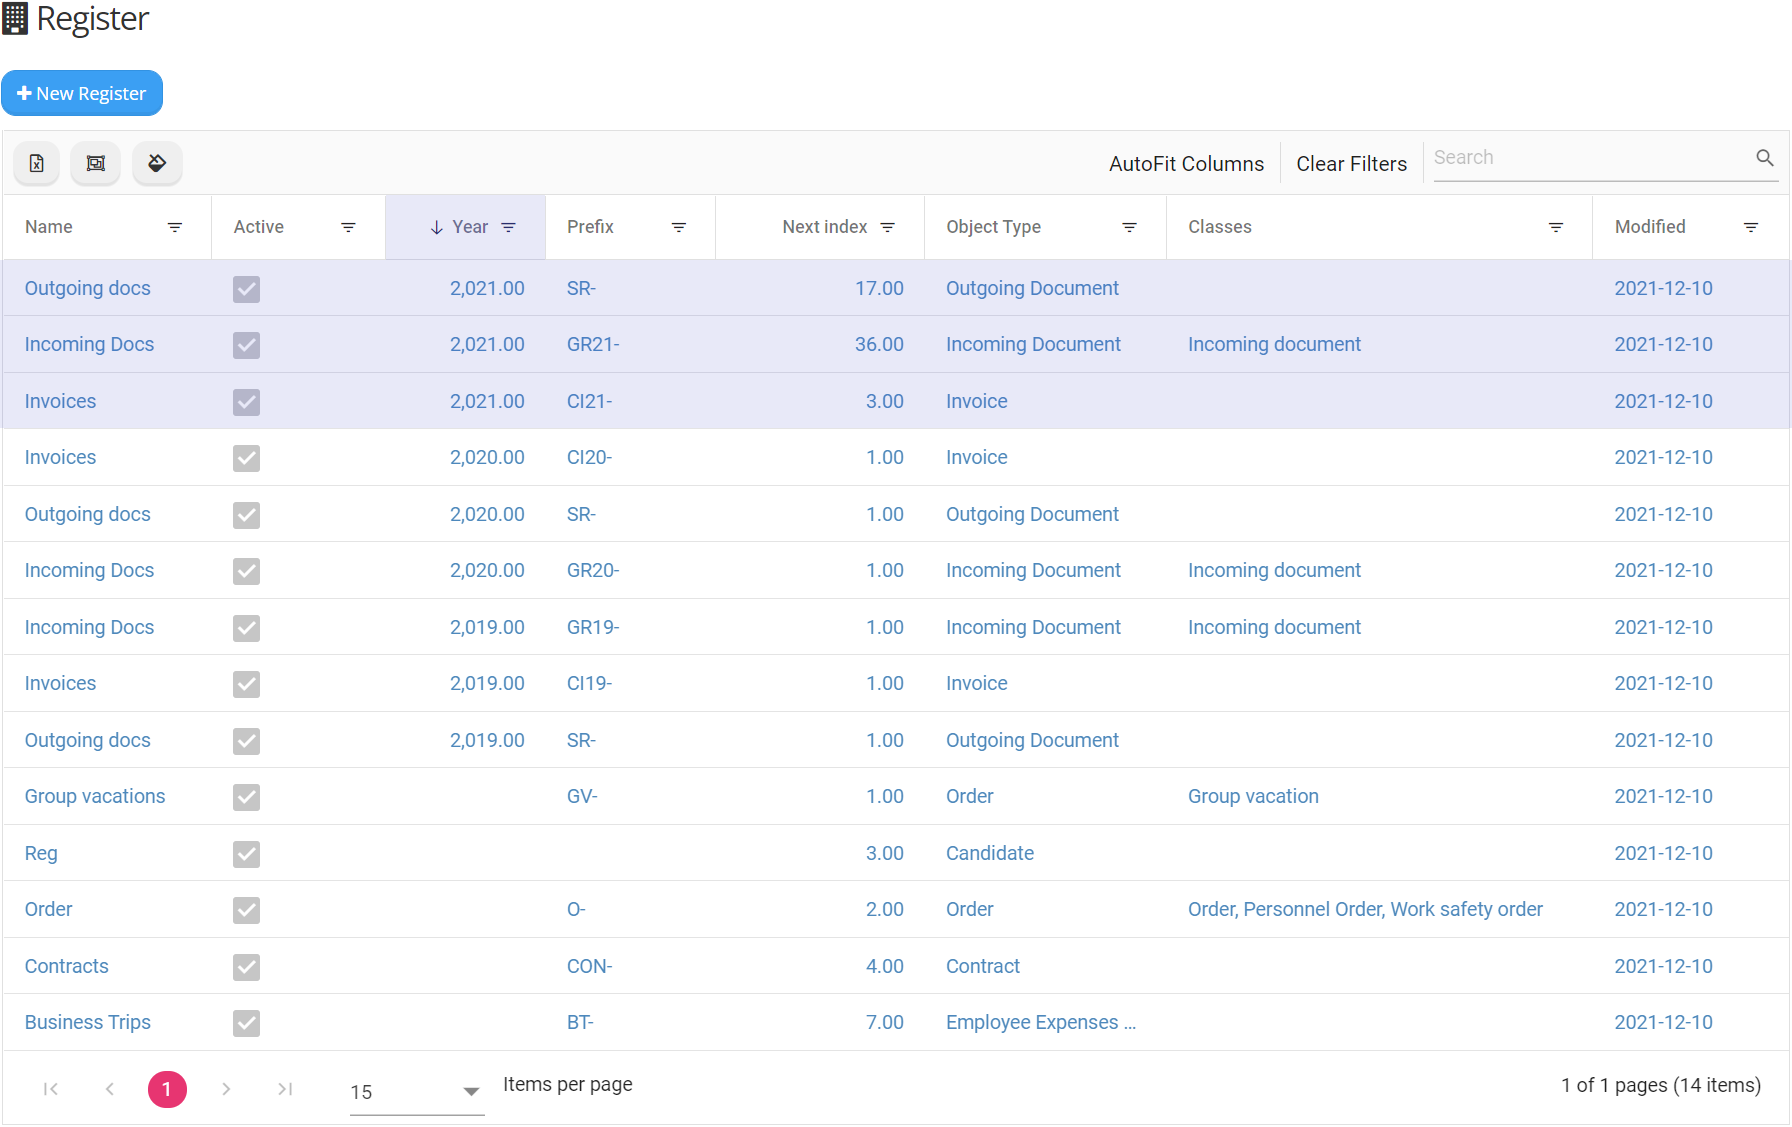
Registers that have the current year assigned, in this example 2021 - are the registers that require an update.
Registers from previous years, in this example 2020 and older, should not be updated as they have already been updated to the current year!
1.3. Update.
1.3.1. To update registers, you need to create copies of existing registers.
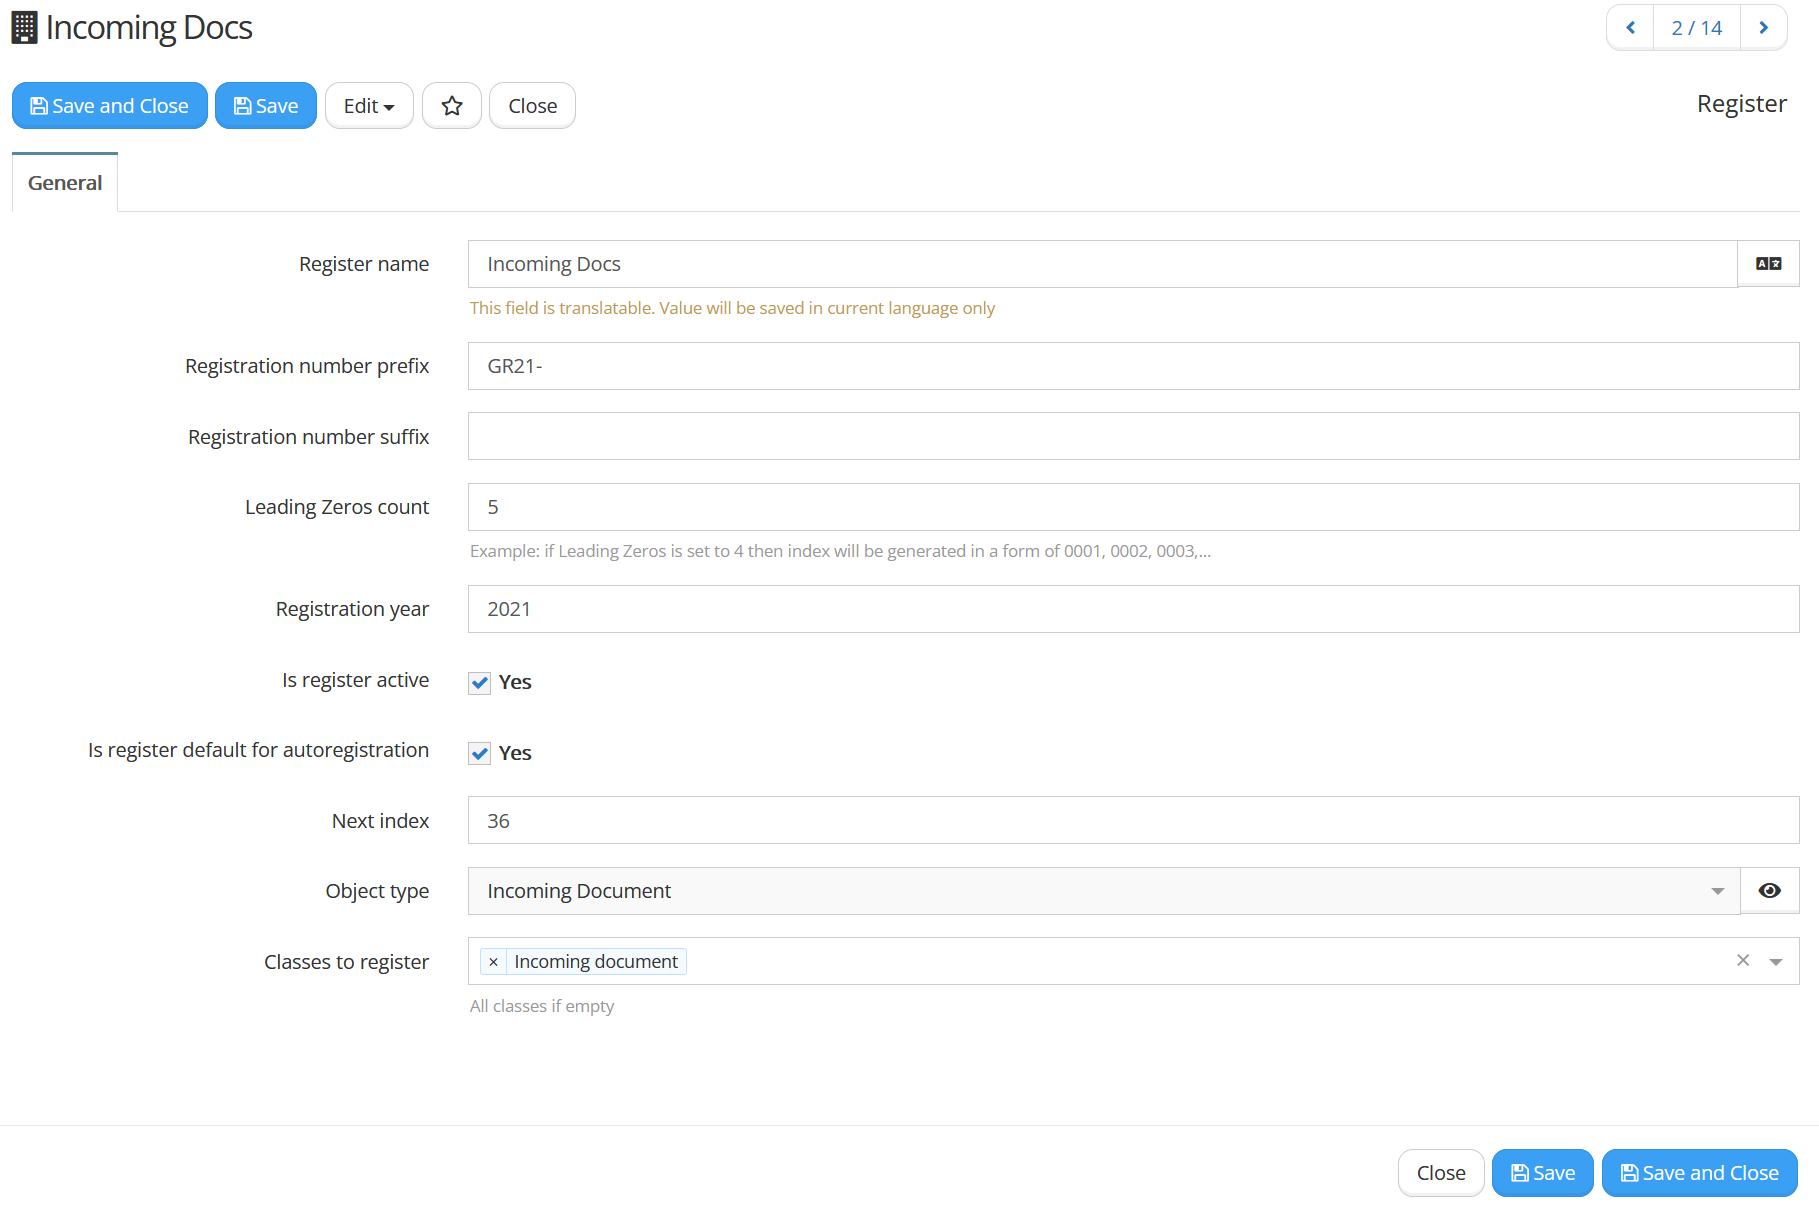
1.3.2. In the ![]() window select a register that requires update and click on it. The selected Register's form will open up (Fig. 3).
window select a register that requires update and click on it. The selected Register's form will open up (Fig. 3).
1.3.3. In the form window click on  and select
 ![]() from the drop-down list. A new Register form window will open. All entries from the original form will have been copied to this one.
from the drop-down list. A new Register form window will open. All entries from the original form will have been copied to this one.
Be careful not to accidentally select ![]() in step 1.3.3. and remove your current registers by mistake!
in step 1.3.3. and remove your current registers by mistake!
Do not edit the fields in the currently in use (original) register form. Only edit the fields in the copied register form.
1.3.4. The fields of the form are detailed in Table 1 shown below. The fields marked bold are the fields that will have to be edited to finish the update.
Table 1. Register form fields.
| Field title | Description |
|---|---|
| Register name | Title of register (required field). |
| Registration number prefix | Text added to beginning of document registration number. |
| Registration number suffix | Text added to ending of document registration number. |
| Leading Zeros count | Denotes the size of register to be specified in the registration number. An example register with leading zeros count of 3 would register the first document with an index of 001 and can go up to index 999. |
| Registration year | The year of registration. The correct year format is YYYY, e.g., 2022. |
| Is register active | Registers that are in use have to be selected |
| Is register default for autoregistration | Active registers have to be selected |
| Next index | Index to be given to the next document assigned to this register. |
| Object type | This field should not be changed! It specifies the document type to be registered. |
| Classes to register | This field should not be changed! The field is not required, and might have been left empty. The field specifies the document type to be registered. |
1.3.5. In the newly copied register edit the fields:
- Registration year - enter the new year, for example 2022;
- Next index - enter the value 1.
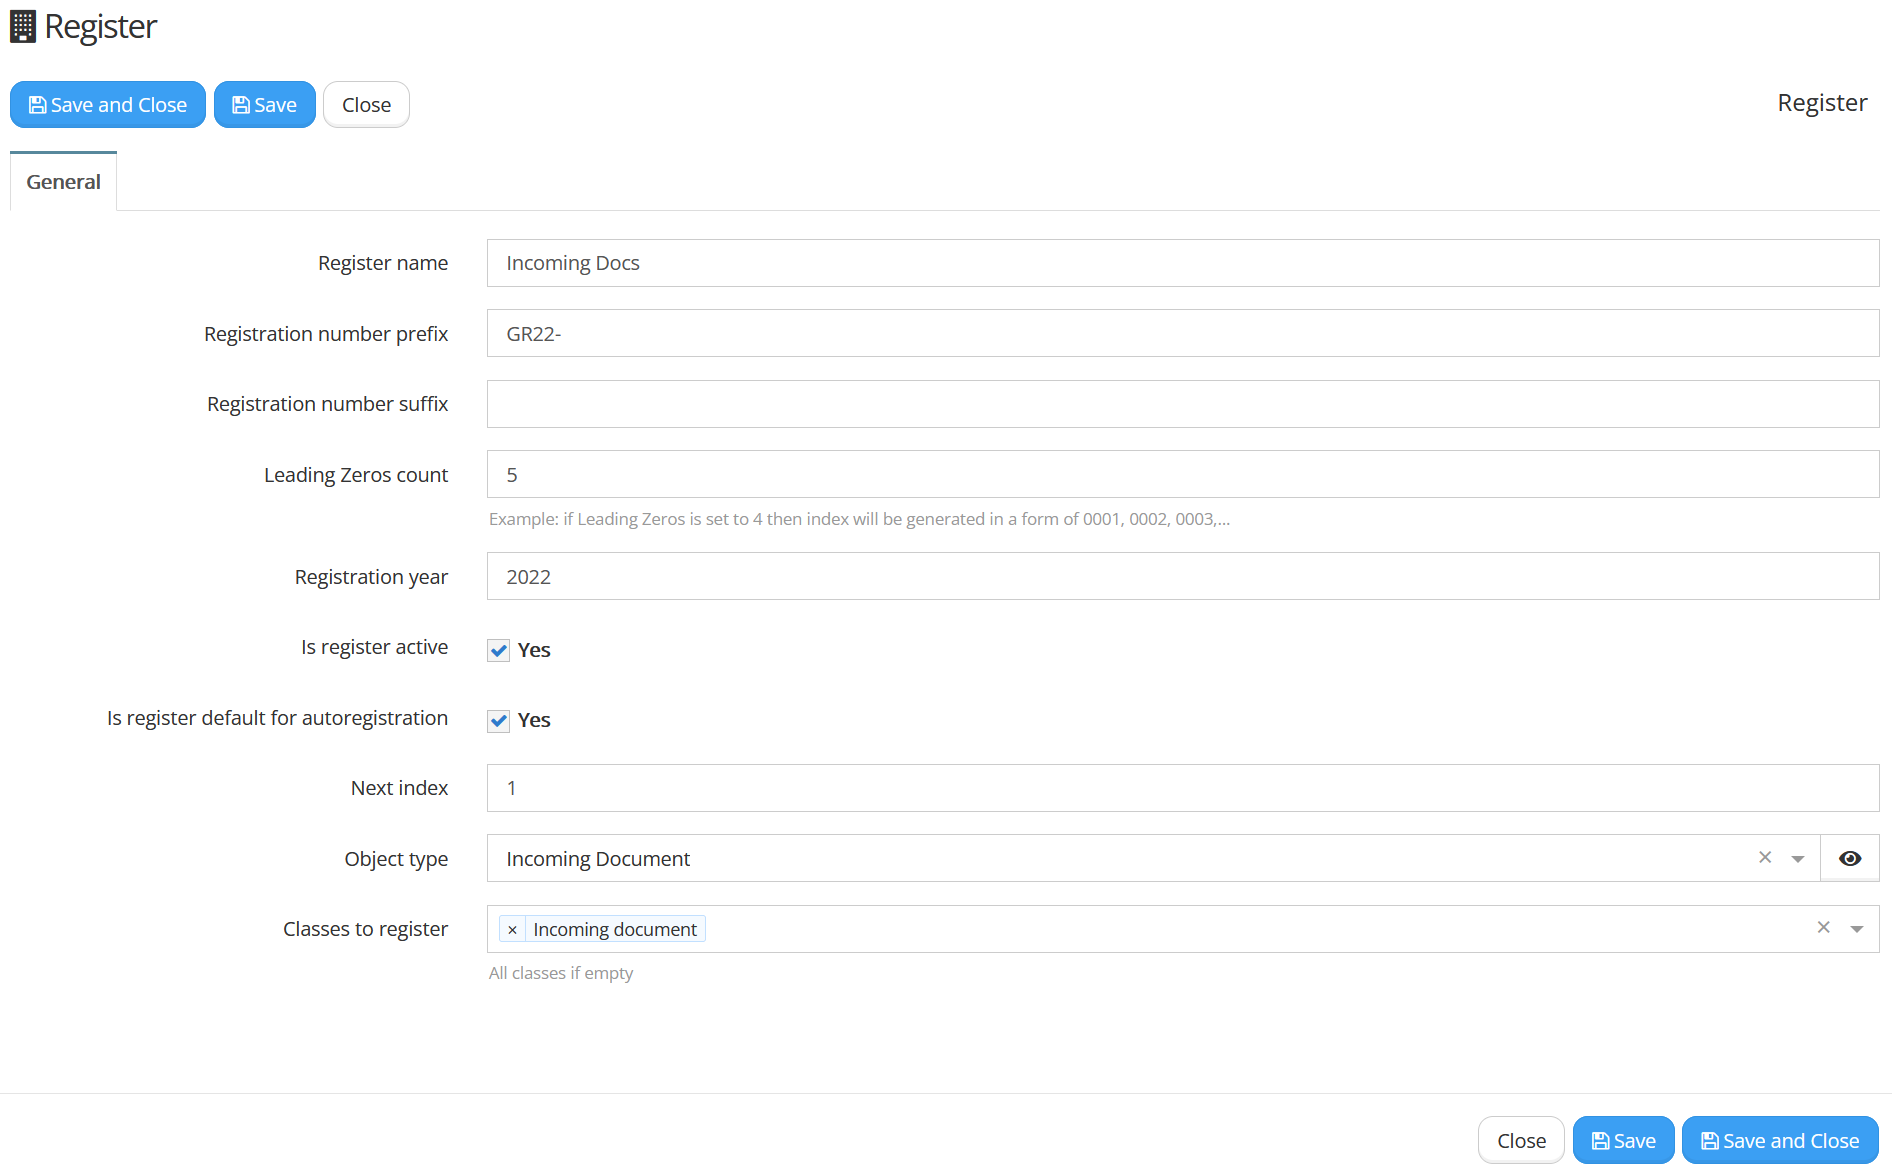
1.3.6. If your organization specifies the current year in the fields Registration number prefix and (or) Registration number suffix, you will have to change those fields as well. In the example shown in figure 3, the year was specified in the Registration number prefix field - "GR21-". Just change the field to indicate the correct year, in this case it would be - "GR22-". An example of a copied and edited form is show in figure 4.
1.3.7. All necessary edits have been made. Click on  or
or  to save the new register.
1.3.8. After closing the copied form, you will be brought back to the original form. You do not need to edit the original form. Just  it and continue updating other registers as required.
1.3.9. If you want to maker other changes to a new register after closing it, just select it from the list, make the necessary edits and or to save the changes.
1.3.10. Example register list updated for the year 2022 is shown below (Fig. 5, highlighted rows show registers with registration year 2022).
1.3.11. If you have finished creating copies of your registers that use yearly registration and editing them, you have finished register update and your system is now ready to register documents the following year.
2. Assigning security group.
This chapter describes how to create a new security group and assign it to a responsible person or persons, so that they could have access to create and modify Registers.
Users that have the role "Company contacts administrator" can create and assign security groups and assign roles to other users.
2.1. Navigate to security Groups window.
2.1.1. Click on the ![]() module in the Vecticum app left-hand side menu.
module in the Vecticum app left-hand side menu.
2.1.2. Select the module that contains your organization's title and is between ![]() and
and ![]() . Click on
. Click on ![]() .
.
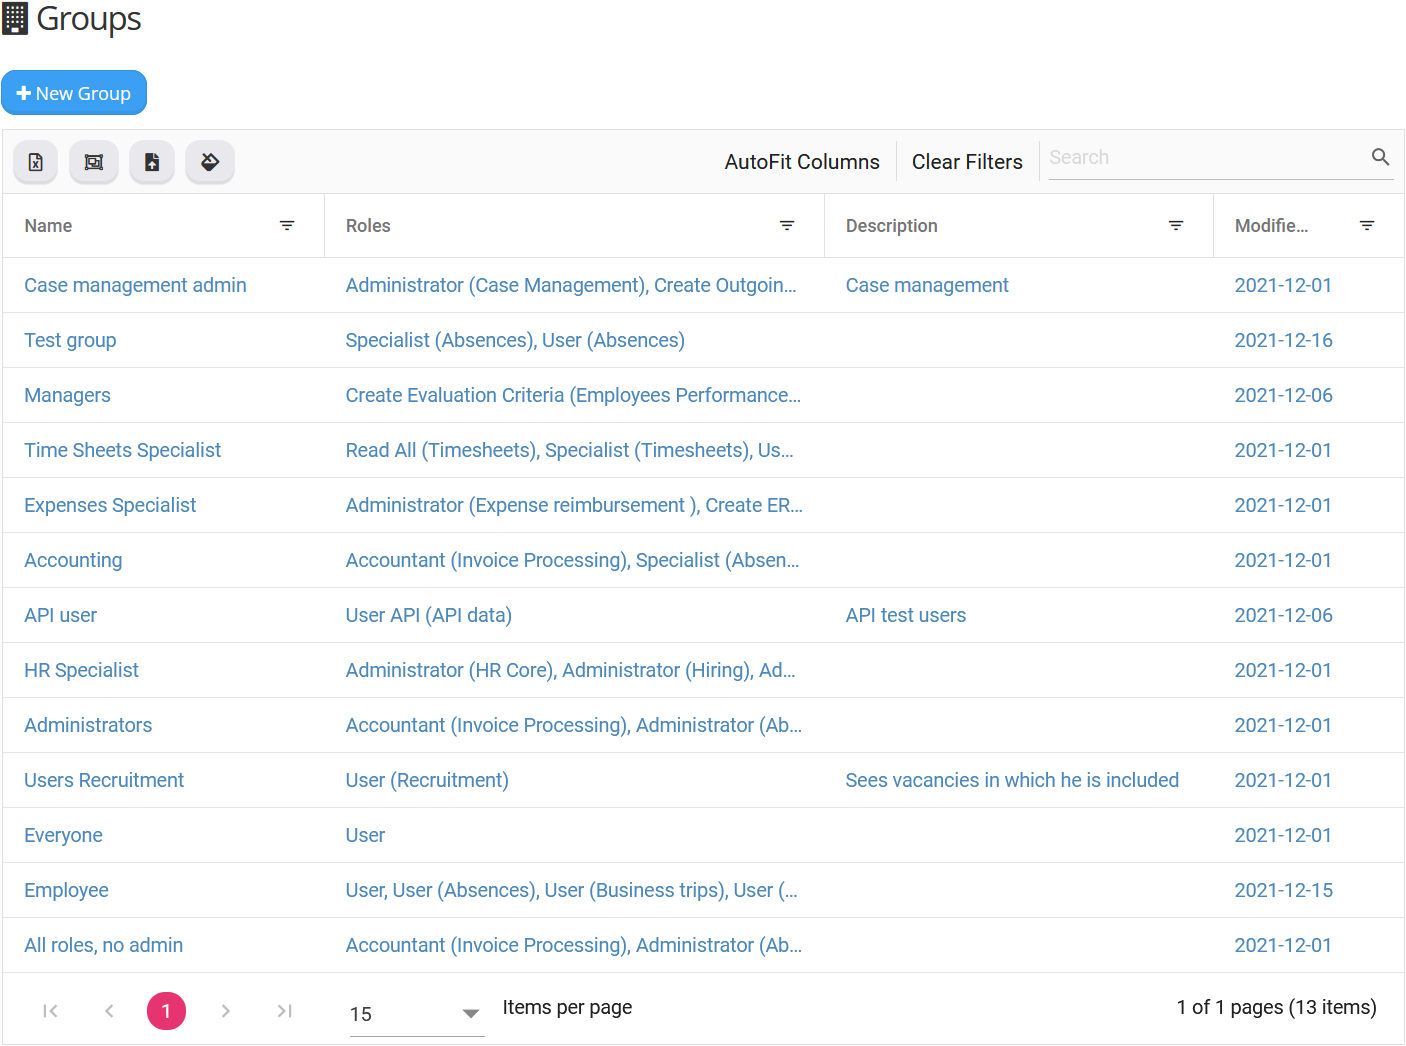
2.1.3. Your organizations security Groups window will be shown. An example security Groups window can be seen in figure 6.
2.2. Create and assign a security group.
2.2.1. To create a new group click  in the
 ![]() window. A new security Group form will open (Fig. 7).
window. A new security Group form will open (Fig. 7).
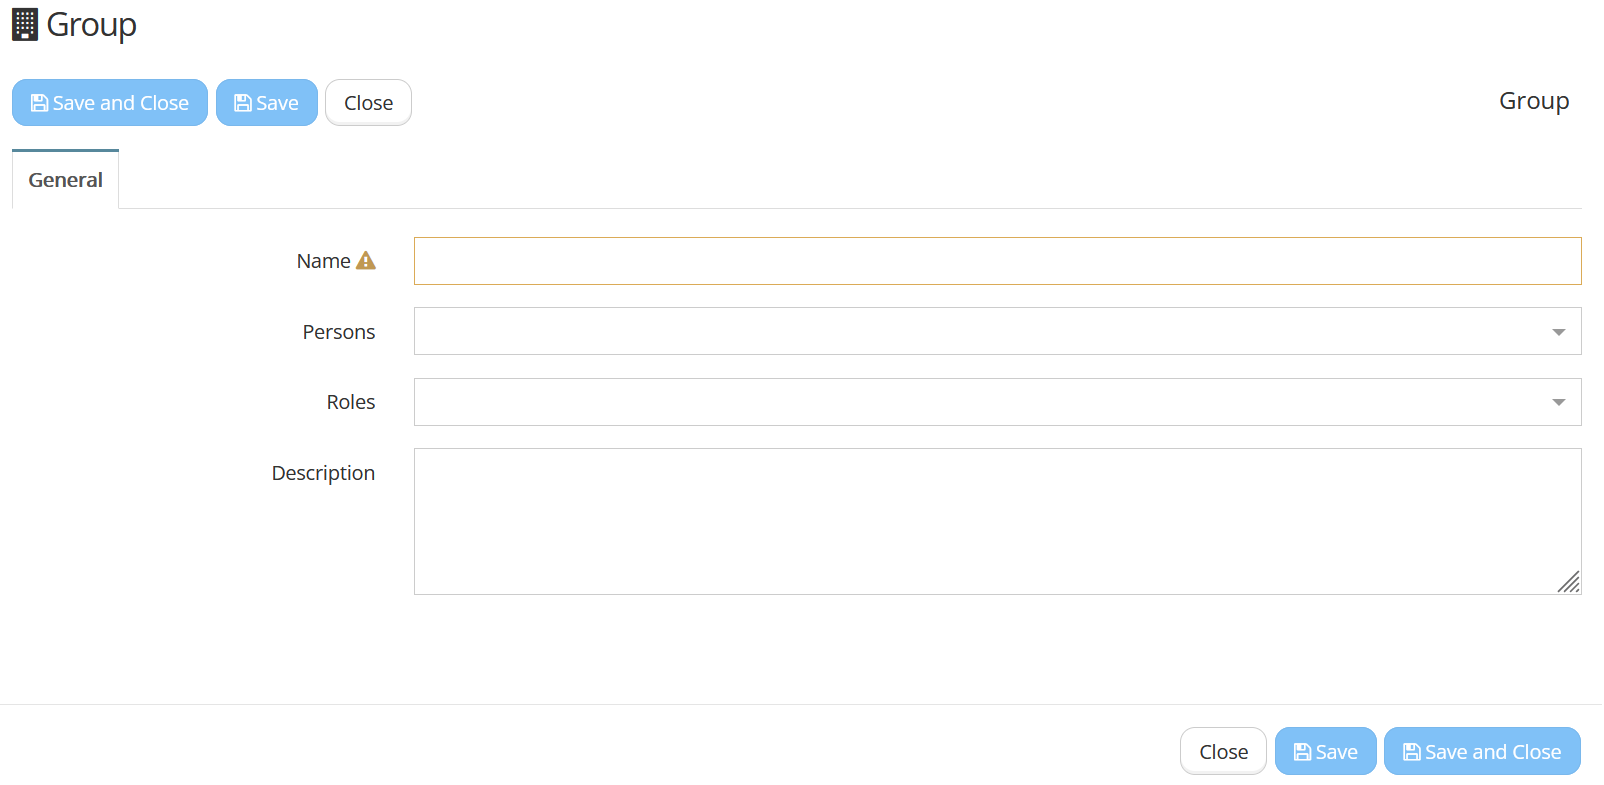
2.2.2. Fill the Name field (required). Suggested name is "Register manager".
2.2.3. Specify the responsible person or persons in the Persons field by selecting from the drop-down. You can also type to find the employees faster.
2.2.4. In the Roles field select "Company Setup administrator" from the drop-down list.
2.2.5. All necessary edits have been made. Click on or to save the security group and assign it to the responsible persons. The responsible persons will now be able to access the Registers window.
2.3. Edit existing security group
2.3.1. The role "Company Setup administrator" can also be assigned to an existing security group.
2.3.2. Click on a group you want to edit. The groups form will open.
2.3.3. Specify the responsible person in the Persons field and in the Roles field select "Company Setup administrator" from the drop-down list.
2.3.4. Click on or to save the edits to the security group. The responsible persons will now be able to access the Registers window.