Object Types
Introduction
Object type is basically a template for objects that you want to create in the app.
Examples of object types usage for different business types:
- There is predefined object type called 'Person' in system for representation of the people - separate persons (individuals).
- Each specific group of business objects or documents representing them, should have created separate business type. For example in standard HR Core system from the employee card (HR Core -> Employees), in 'Employment & Compensation' section, you will find the related with employee, records which represent the details of employee's employment contract; in system we have created the separate object type for representing these records: 'Employment and Compensation'.
- Classification records of certain category also typically have created separate object type; for example for mentioned above 'Employment and Compensation' documents, there is assigned on their form 'Employment Contract Type' (permanent, temporary, ...) . In order to reflect in the system this classification, there is created the object type: 'Employement Contract Type'.
Introduction of the classes related with object type:
Object type has sub-types called classes. You have to create at least one class for an object type.
Related with object type classes, represent the different sub-types of the main object type. For example for the object type: 'Employment and Compensation', in system there are defined the following classes (each of them representing special type of employee's employment contract document (contract itself or it's update with annex) or key event related with it - termination of contract): 'Employment and Compensation', 'Amendment of the employment contract', 'Termination'. Classes are described in below, after REGISTER tab.
How to create an object type
Before creating an object type, it is recommended to first create in advance, the new view that you will use for this object type (see Views; at least 1 attribute should be added to the view on this stage, further during the deployment, other attributes can be added to the view). Creation of the form will be needed during adding the classes to an object type.
To create an object type, go to Administration > Metadata > Object types and select New Object Type.
General
Here, edit main settings of an object type.
| Attribute | Description |
|---|---|
| Name | Name of an object type. |
| Name (plural) | Plural form of the name. This is used as a title in lists. |
| 'New button' name | Name of a button that opens a form for creating a new object, e.g., 'New document', 'New contract'. |
| Icon | You can specify an icon that will be used in forms and lists next to the object name. To choose an icon, go to Font Awesome (https://fontawesome.com/icons?d=gallery&m=free) and search for the icon you want. Open the icon and copy here the icon class name, e.g., far fa-file-alt OR fa fa-building. |
| Background color | Select a background color for this object type. This color is used in e.g. calendars, as form header color etc. |
| View | Assign a view for this object type. A view defines how objects are displayed in the list. It has to be created beforehand. Please see (Views). |
| Parent object type | Specify a parent object type if your object type is dependent. The example of the usage of this attribute is in definition of object type: 'Purchase Invoice Costs Allocation' which represent cost allocation line for the purchase invoice. The line can not exist without the header of the invoice. The value of this attribute is assigned as 'Invoice' which appoints Invoice as parent object type for invoice allocation line. |
| Parent key | A key that links a parent object with a child object. This is the key which connects the defined object type to the parent object (specified in above described attribute 'Parent object type'). In fact this is the key of Children type attribute placed on the form (assigned to the related class) of parent object. In our example the value of the attribute is: costAllocations . This is the key for 'Cost Allocations' attribute, placed on 'Purchase Invoice' form (which is assigned to class 'Purchase Invoice', which is assigned to object type: 'Invoice'). |
| Data type | Specify what type of data the objects will contain.
|
| Is Primary Object Type | This is the markup of the object type which is used in installation process for the App. If the object type is included in the App and marked this way, then system knows it should be treated like the main object during app install. It means that when App is installed the object type is uploaded with all the class children, related with them forms, attributes on the forms, related object types with attributes. But it stops on this stage, and with this markup is not uploading additionally all the other classes in where the uploaded form is used. |
Classes are described in below, after REGISTER tab.
Registers
For object type we are defining setup of registers. Registers are holding the definition of assignment of registration number to created documents / records of defined object types. Registration number is given for the document once during the lifetime of the document and is not changeable. By default the registration number is presented in top right corner of the document:
-44f212a77c6f1735c8a70379c2f2a3a9.png)
The documents with assigned registration number are not possible to be deleted (even for granted for edit action users) as long they have assigned registration number. The workaround method of deleting the document with assigned registration number is: 1) to add to the form of the document the attribute with assigned key: id_registrationNo with Write option, which represents registration number, 2) on document form delete the attribute value of registration number, 3) then delete the document (Edit -> Delete from the menu of the document).
Here, you can edit settings of document registers. You will be able to create registers after the first save of the object type.
To create a new register, select New Register.
| Attribute | Description |
|---|---|
| Register name | Name of a register. |
| Registration number prefix | Prefix that will be added before the registration number index (increasing part) . For example: VAR |
| Registration number suffix | Suffix that will be added after the registration number index (increasing part). Typically it is not in use, as the increasing part of the number (index) is only prefixed. |
| Leading Zeros count | Overall quantity of digits in registration number's index. For example, if your 'Leading Zeros count' is set to 4, the document index will be generated as 0001, 0002, 0003, etc. |
| Registration year | Year of the document registration. Typically remains empty if there is assumed continuous register althrough, in consecutive calendar years. |
| Is register active | Check the box to mark the register as active. |
| Is register default for auto-registration | If checked, records will be added to this register by default, if not specified otherwise. |
| Next index | The value for the next Index to be given during registration, in this defined register, of the document of certain object type. In the moment of creation of the register, value 1 should be inserted. |
| Object type | Object type of the documents to be registered with the use of the defined register. Is filled by default with parent Object type. |
| Classes to register | Specifies the sub-set of the classes from the collection of the classes related with the object type. If this property is empty, then all the classes related with the object type (related with defined register) will be taken into account while performing registration of the documents (documents of the all classes related with object type will be registered in this register). |
In the above example the full registration number will be composed like: VAR0001.
The whole registers are accessible in Administration -> Metadata -> Registers
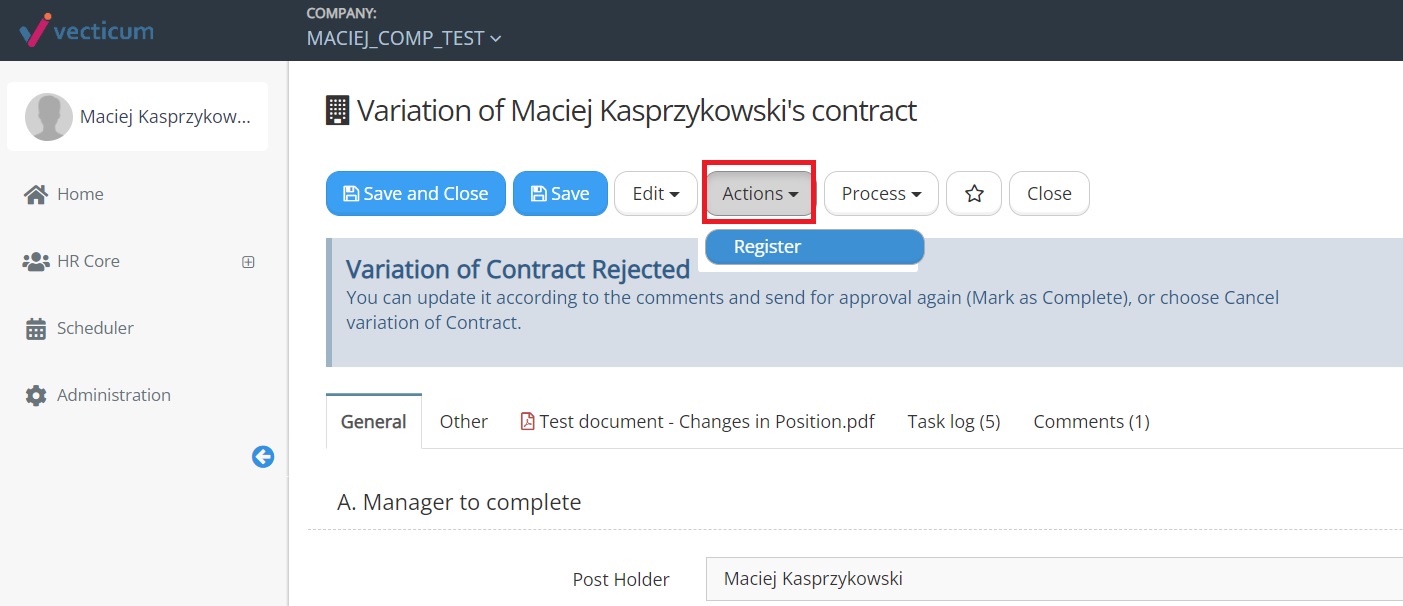
The registration is deployed typically by adding Workflow Step System according to the below definition (Register):
-337447d8882c9ad8dc6ad2ac9b4339d3.png)
or by the definition of the Toolbar button in the class with Register action: Toolbar
Register Custom introduction
Functionality of 'Register Custom' is used for creating custom mechanisms of counters. It also can be applied for the inbuilt object types like person. The registration action is always triggering the increase of the counter. The differences between registration to custom register and standard register are: 1) you can delete the documents registered with the use 'register custom' , 2) the number given by registration with the use of 'register custom' functionality contains only counter (no pre or suffixes are in use).
How to setup Register Custom
1) Create attribute and place it on the form related with the class assigned to defined business type. It should be of simple type, for example Text. This attribute will be updated with the current number of defined 'Register Custom' in the moment of performing registration.
2) Open object type definition, in Registration tab, create custom register with Register Custom URL. Fill in
| Attribute | Description |
|---|---|
| Register name | Name of a register |
| Control key | Please specify in here the key of the attribute which was created at step 1) . The attribute pointed in here will be updated with the current number of defined 'Register Custom' in the moment of performing registration. |
| Next index | The value for the next Index to be given during registration, in this defined register, of the document of certain object type. In the moment of creation of the register value 1 should be inserted. |
| Object type | Object type of the documents to be registered with the use of the defined register. Is filled by default with parent Object type. |
| Classes to register | Specifies the sub-set of the classes from the collection of the classes related with the object type. If this property is empty, then all the classes related with the object type (related with defined register) will be taken into account while performing registration of the documents (documents of the all classes related with object type will be registered in this register). |
3) Add the button to the class /-es defined 'under' certain object type. In class form you will find possibility of adding button in 'Toolbar' tab. The definition of the button should be orientated on register action. Please find in below the example definition:
-1bd216ce8ffa08562297a1f83be29a46.png)
The button should appear on the appropriate form. After it is pressed, custom registration is triggered. The value of the attribute defined in 1) is filled with the value of 'Next index' of corresponding custom register. After that the 'Next index' in custom register is increased by 1 up. There is no possibility to perform a few times custom registration (with the effect of assigning the next counter from custom register) to the same document. Custom registered document is not locked for deletion (like in standard registration).
You can find more information on register in 'User guide' section, in register-update subpage.
Advanced
This part of the setup is currently used for definition of the templates of cost allocation lines for purchase invoices. You can find it in definition of object type 'Purchase Invoice Costs Allocation' which represents the cost allocation line for the invoice. For this object type as template object is assigned 'Purchase Invoice Costs Allocation TEMPLATE'. In the form, assigned to the class of the template object type, you will find the attributes used for matching of the template to the invoice like: Vendor (key: counterparty) and Author (key: Author) as well the children type attribute which will represent the lines in the template.
| Attribute | Description |
|---|---|
| Template Object Type | Points to the template object type which should be used while creating the documents of the defined object type. |
| Templates filter | Specification of the filters to be applied to the template. |
| Templates params | The definition of the parameters to be pushed while applying the template |
Classes
Introduction
A class is a sub-type of an object type. A section for classes appears at the bottom of General tab of Object type form, after creating an object type (after the first save).
Related with object type classes, represent the different types of the main object type. For example for the object type: 'Employment and Compensation', in system there are defined the following classes (each of them representing special type of employee's employment contract document (contract itself or it's update with annex - amendment) or key event related with it - termination of contract): 'Employment and Compensation', 'Amendment of the employment contract', 'Termination'.
Creating the class
Before creating the class it is recommended to create the form representing the objects of certain class. (see Forms).
To create a class, select New Class from object type form, at the bottom of General tab. Most of definition properties (attributes) in class definition are the same as of a parent object type. While creating the new class, system fills in the set of the same attributes from the root object type, which can be used without any change, especially while crating the fist class to the object type.
General
| Attribute | Description |
|---|---|
| Name | Name of a class. |
| Name (plural) | Plural form of the name. This is used as a title in lists. |
| 'New button' name | Name of a button that opens a form for creating a new object, e.g., 'New document'. |
| Icon | You can specify an icon that will be used in forms and lists next to the object name. To choose an icon, go to Font Awesome (https://fontawesome.com/icons?d=gallery&m=free) and search for the icon you want. Open the icon and copy here the icon class name, e.g., far fa-file-alt. |
| Background color | Select a background color for this class of objects. This color is used in e.g. calendars, as header color etc. |
| Form | Assign a form template for this class of objects. A form defines the data (set of attributes) of an object . It has to be created beforehand (see Forms). Form is obligatory to be filled in in order to successfully create the class. |
| View | Assign a view template for this object type. A view defines how objects are displayed in the list. It can be created beforehand. (see Views). |
| Workflow | Assign a workflow for this object type. (see workflows) |
| Keep form open on workflow start | When the workflow is assigned to the class and 'Manual workflow start' is not marked, then workflow starts automatically when document is created. The explained attribute is working only for such setup with automatic workflow start. When the explained attribute is marked, then system after creating document is keeping the form of the created document open. Otherwise it is automatically closed after creating the new document. |
| Manual workflow start | If not checked, workflow will start automatically on document creation. Otherwise (means : if checked) workflow will not start automatically on document creation. No matter on this attribute markup, the manual start of the workflow will be possible for granted users. The meaning of this attribute is : 'Reduce 2 available methods of starting the workflow: automatic and manual TO only 1: manual method of starting the workflow' |
| Workflows | Please specify in here a few workflows in the case for certain class are relevant more than single workflow |
| Facet template | A facet is a label of an object that is displayed in lists and forms. The default expression is '${name}' - this means that the system takes the value from the field with a key 'name' and uses it as a label of the object. This can be modified though. You can take any other attribute's key and use it as a display name. You can also write an expression that creates a custom object name, e.g. displays document's date, dates from and to, etc. See examples in Facet expressions and in class facet template expression. |
| Parent key | A key that links a parent object with a child object. This is the key which connects the defined object type of this class to the parent object (specified in attribute on root object type definition: 'Parent object type'). In fact this is the key of Children type attribute placed on the form of parent object. This definition of the parent key to the class, overrides the parent key assigned to the root object type. |
| Statuses | If the user has appropriate level of permissions to the document, then she/he is able to change manually the colorful label of documents status, placed in top right corner on the document form. The definition in here of the statuses, implicates which status will be possible to pick up manually from the dropdown list in colorful label list of statuses in top right corner of the form. Another way of defining possible manual change of value of status is to add on the form related with the class the Dropdown type attribute orientated on the key: status and define for only available statuses with Filter, for example: Filter: id.IN('QqRZYDxyGfyOZe9ixvVu','rgROxbNneK2HRScy3Ytf','DUjw2HprF6GMx595R0AH','SqqdcjE6DrQkeLpHIIbm','5W4yldg4vR3XcAZy5L18') |
| Initial status | Status that will be displayed in an object form after starting the workflow. Another way of manipulating the status on workflow start is to add system performed step at the beginning of the workflow with assignment the value for the status. If workflow starts automatically then you can alternatively add on the form related with the class the Dropdown type attribute orientated on the key: status and define the 'Default value', for example : {"id":"SqqdcjE6DrQkeLpHIIbm"} |
| Cancel status | Status that will be displayed in an object form after cancelling the workflow. Typically it is assigned in here: Cancelled. |
| Show tasks | Shows a Task log tab in an object form. In this tab, you'll find all tasks created for a document in a course of a workflow (see Processes and workflows). Note that for Task log tab to be visible, a form must have at least one tab for attributes created. |
| Show files preview in form tabs | If marked:, shows the attached (in the file type attribute on the form attached to defined class) physical files in separate form tabs. |
| Assign files from Dropzone | Allows to add files to a document of defined class from a Dropzone file sharing app. The app is available in the system home page in top-center part of the screen, in where user can drag and drop their file in rectangular area 'Drop your files'. After the file is dropped it becomes available in 'Files' section below the 'drop zone'. After opening the dropped file, user is able to classify the document by filling the attribute 'Select document type' and pressing 'Next' button. Availability of the document class on the dorpdown list 'Select document type', depends on the described attribute mark up. |
| Form attribute key for assigned files | This attribute appears only if 'Assign files from Dropzone' is marked. A key of a form attribute where files from Dropzone will be added after pressing 'Next' button in above described process. |
| Can be created from calendar | The possibility of the creation of the new object of the defined class from calendar. |
| Keys to assign on creation from calendar | Which attribute (identified by the key) should be filled with the selected on calendar dates. |
Access control
Action permissions are set for each object class separately. Objects of the class will be accessible and actions will be allowed only to users which have been assigned with specified roles. The security roles are assigned to the user groups. Every user who is the member of the group is granted with the role assigned to the group.
These settings are not mandatory, but be careful - if, let's say, no role is set in Read all field, no one will be able to view objects of this class, unless they are appointed in attributes values for the document or participating in related workflow.
| Attribute | Description |
|---|---|
| Create | Add roles that have permission to create objects of this class. |
| Read all | Add roles that have permission to read all objects of this class. |
| Write all | Add roles that have permission to edit all objects of this class. Please notice that restrictions after document registration are of higher priority, which means that registered document can not be edited even by these users which are granted with described role. |
| Permit write for persons included into object | When a person of different role is added to an object (e.g. as an approver), this setting allows the person to edit that specific object. |
| Permit to write for persons included into keys | When a person of different role is added as the value for the attribute (identified by the key inserted in this setting) placed on the document form assigned to the defined class, this setting allows such persons to edit that specific object. This is extension of the functionality that all the users appointed to the document on the document form as the values of single or multiselect attributes are granted with read only possibility. |
| Permit unlock all attributes for roles | Unlocks the edit possibility of all the attributes placed on the form related with the class, in the case user has been assigned with any of the roles specified in this setting. Roles are assigned to the groups; user should be the member of the group to be granted with the role. |
| Delete all | Add roles that have permission to delete any object of this class. |
| Permit delete for persons included into object | When a person of different role is added to an object (e.g. as an approver), this setting allows the person to delete that specific object. |
| Permit to delete for persons included into keys | When a person of different role is added as the value for the attribute (identified by the key inserted in this setting) placed on the document form assigned to the defined class, this setting allows such persons to delete that specific object. |
| Administer all | Users assigned with the roles specified in here, will have possibility to administer all documents of the defined class. |
| Permit administer for persons included into object | When a person of different role is added to an object (e.g. as an approver), this setting allows the person to administer that specific object. |
| Permit to administer for persons included into keys | When a person of different role is added as the value for the attribute (identified by the key inserted in this setting) placed on the document form assigned to the defined class, this setting allows such persons to administer that specific object. |
| Keys to related objects that permits access for tasks performers to read these objects | The documents of defined class have associated tasks. The performers of these tasks by this setting, will be granted with read access to the related objects. This relation is established by the attributes placed on the form, specified in this settings by their keys. |
Please notice, that in addition to the security roles assigned for the class, there is inbuilt logic that every workflow participant (performer of the workflow step) as well persons appointed in single choice of multiple choice attributes, placed on the form will have the read access to the document. Also managers of these appointed employees will have the read only access for the document.
Ledger
Ledger is separate table per each company in the system. Every user in the company have a possibility to read it. Records in the ledger are holding basic, public information on the business events, for example the date of absence and employee who is absent. From the business objects like absence request of certain employee for 10 days, there are created 10 separate records in result, each representing the absence in each day in this example. Each created record also holds the information of the quantity per record (in this example 0 (if in requested range are public holidays) or 1). As it presents on the lowest possible granulity the taken or engaged capacity of resource in time, it is used for calendar visualization as well for counting the days requested / taken.
| Attribute | Description |
|---|---|
| Write to Ledger | Enables writing to ledger. For example for object type: Absence, for the class: Leave Plan this functionality is turned on. |
| Ledger split keys | Attribute of the date type, indentified by the key defined in here. By this attribute value (which should be placed on the form related to defined class), system will be performing the split, while creating the records to the ledger. In our example, there is appointed key: datesRange, which identifies attribute 'Dates Range' on 'Leave Plan' form. |
| Attribute that lookups to 'Time Track' | If not set, 'Days' time track method is used. In UK specific, time track can be perform with the use of hours instead of days. In our example the value is: leaveType.timeTrack . It appoints time track record appointed to leave type, which is assigned to leave request. |
| Ledger keys | Keys that must be written into ledger. Keys should be separated by comma. Use arrow '=>' to change keys in ledger. I.e. 'driver=>person'. This is the mapping between attributes on the form and in the ledger. For example: employee=>person,datesRange=>fromTo,leaveType=>leaveType,partDayFrom=>partDayFrom,partDayTo=>partDayTo,timeTo=>timeTo,timeFrom=>timeFrom |
| Statuses | Valid for statuses. All statuses are accepted if empty. |
| Ledger is negative | Enables adding negative capacity values for ledger records for example for cancelation of the leave. Further setup is deployed in featue or app level. |
Toolbar
In the buttons list, here is defined list of the buttons which will be accessible in the document form under Actions menu in document form:
While creating the button please fill in the following attributes:
| Attribute | Description |
|---|---|
| Label | The label of the button |
| Type | Should have the value: Function |
| Action | The name of the action triggered on button click. For example - for registration action: register . |
| Params | Additional parameters. |
| Icon | You can specify an icon that will be used in forms and lists next to the object name. To choose an icon, go to Font Awesome (https://fontawesome.com/icons?d=gallery&m=free) and search for the icon you want. Open the icon and copy here the icon class name, e.g., far fa-file-alt or fa fa-building. |
| Position | Dropdown - button is available from the menu of the document under: Actions -> Button label Top - button is available from the menu of the document on the top, instead of Actions button |
| Show when status | Button should be visible only if the document has one of the defined in here statuses. |
| Order | The order of the display of the button among other defined for the same toolbar for the class |
| Visible For Roles | The button will be visible only for the users assigned as members to the groups to which at least one of the specified in here roles is assigned |
| Visibility expression | Custom visibility expression which should operate on keys of the attributes appearing on the form assigned for the class |
You can find different examples of buttons implementation in: forms
Translation
Here you can define which form attributes will be translatable. Translatable means that you will be able to save attribute value in different app languages that are available for you.
To specify which attributes will be translatable, enter keys of those attributes separated by comma without spaces (e.g. key1,key2,key3).
How do translatable attributes work?
Let's say, you have English and Lithuanian languages enabled in the app:
- Set the app language to English.
- Open an object and enter a translatable attribute's value in English. Save the object.
- Then set the app language to Lithuanian.
- Open the same object and enter the same attribute's value in Lithuanian. Save the object.
- Set the app language back to English.
- Open the object and find the attribute value written in English.
Comments
Comments are the related records to the document. They are appearing in separate 'Comments' tab on the document form. On the list on the right side inside the Comments tab, there is displayed common collection of the comments: these created manually, as well the ones created in workflow processing. Created comments can not be edited, nor deleted. They are available in read only. Author and approvers in workflow which already approved their tasks or have active tasks are receiving the new notifications on creation of the new comment.
| Attribute | Description |
|---|---|
| Use comments | Shows a Comments tab in an object form. It allows you to write and read comments added to a document. In common Comments list are placed the comments coming from workflow as well these created manually to the document. Note that for Comments tab to be visible, a form must have at least one tab for attributes created. |
| Keys to send new comments | Enter keys which are appointing persons to whom you want to send new comments. Note that all new comments are automatically sent to the persons that have active or finished tasks on document, so there's no need to specify keys for the attribute for these persons. |
| Use confidential comments | Turns on confidential comments. Confidential comments are available according to the restrictions of security which are defined in Access control tab for the class specified in 'Comments class'. |
| Comments class | Which class has to be used for confidentiality comments. The security settings in 'Access control' tab of this class determines who will have the access to the confidentiality comments. |
| Possibility to choose recipients for confidential comment | Possibility to appoint from which attributes (identified by the keys) the recipients for comments have to be resolved. |
| Include comments from related keys | Implicates sending additionally notifications to the individuals (single or multi value) appointed in the keys specified in here (to be verified experimentally). |
Filtered views
Filtered views are alternative views for certain class.
| Attribute | Description |
|---|---|
| 'Active' statuses | In the cases the statuses value are defined in here, then on display view of the documents of this class, the view is split to 2 separate views: 1) ACTIVE - which shows only the documents of appointed statuses, 2) ALL - shows all documents |
| 'Completed' statuses | Even if defined, are not shown. Anyway as workaround you can define 'New Class filtered view' (explained in below, under this table) as 'Completed' and define statuses accordingly. |
| Hide 'All' view | If "'Active' statuses" are defined, it (the explained option) hides ALL view, so only ACTIVE is available (and other custom defined as Class filtered view). |
| Employee Key | Used to filter out leavers ('Ex-worker' attribute not marked up in person card) from the view. Related documents of Ex-workers are not shown up in the view. |
Class Filtered view is in fact the definition of the new custom view:
| Name | Displayed name of the view |
|---|---|
| Filter Expression | Should return json with filters in format: [{key: 'key', value : 'value'}, {...}, ... ] Example:
You can find more examples in: |
| View | Which view should represent the display of this filtered view. Only needed if the set of columns is different than set of column defined for the view assigned to the class. |
| Employee Key | Used to filter out leavers ('Ex-worker' attribute not marked up in person card) from the view. Related documents of Ex-workers are not shown up in the view. |
| Visible for Roles | The defined view will be visible only for the users assigned with the specified in here roles. Visible for all if empty. |
| Order | Order of the display among other available views. |
You can find the examples of the filtered views implementation in:
filtered-view-filter-expression
Advanced
This section allows you to create complex objects that contain other object types as subobjects. This allows you to group related information into one object.
- Single - a default option. Use this for stand-alone objects.
- Collection - use this option for complex objects.
- Subobject - use this option for object types that are used as subobjects in another object type.
Properties
| Attribute | Description |
|---|---|
| Type |
|
| Should be reclassified before other actions | Before it is launched, additional - the following setup is required: form (related to the class) should contain attribute with key 'classId', that is used to reclasssify document. This attribute also should lookup to Class object type and have filter "assignFiles==true". After the setting is launched, user is supposed to: 1) pick the new class in newly added attribute with key 'classId', 2) after the option is turned on, then button 'Save and Close' is replaced with 'Next' button, 3) the creation of the new document of the appointed class starts appearing in the form; user has to fill in the new document form and press Save and close button (in destination class setup user has to be granted to create the document). As the result the document is reclassified to the new class and accessible in appropriate for the new class, access setup. Matching (on the basis of the equality of keys in root and destination form) attributes' values are transferred from root form to destination form. This functionality is used on the Home page -> Waiting for me -> Files -> open, on the captured document in the system - user can decide how to reclassify the document. |
| Can be reclassified manually | When the setting is turned on, then the 'Move to' button appears in the menu of the document:
After the selection from dropdown list the destination class for reclassification, system automatically reclassifies the document (with keeping matching on the same keys attributes values) and saves it and closes automatically (ignoring duty of required attributes). |
| Notification after create | The text specified in here, is shown in bottom right part of the screen after document creation, if no workflow is assigned. |
| Show in Post Room | In 'Case management' -> Dashboard, there is 'Move to' button with dropdown list as well separate tab. If 'Show in Post Room' is marked for the class, then it appears on the dropdown list as well in the separate tab. (to be verified experimentally, probably additional setup is required) |
| Copy disabled | Disables functionality of copying, available under document menu in Edit -> Copy |
| Direct deletion disabled | Disables functionality of deleting, available under document menu in Edit -> Delete |
| On copy document with Registration No. | Possibility to define copying option: 'Delete Registration No.' - deleting the registration number while copying the document, 'Ask to change Registration No.' - while copying - intermediate form appears in where user can delete registration number. |
| Digital Signature | The property enables digital signing. Prior to this setup digital signing has to be enabled in Administration -> Custom company name -> Company info -> Save action -> Settings button -> Digital signature tab -> Digital signature enabled = True, Digital signature provider = should be chosen from the list of available providers -> Save. The example of this functionality is enabled in _CORE company, for Contracts -> Contracts. On the form: Contract, there is added special 'relation view' type attribute: E -Signatures , orientated to the object type: Signing party. This attribute holds the details of the e-signing. When already e-signed document is uploaded the signing details are filled in automatically. The container also can hold the requests for signing / approval which can be created manually and to the Employee or external Customer. On the form menu appears button 'Endorse & Sign'. In related workflow there are dedicated steps, which are related with e-signing. For example 'Contract Processing' workflow contains 'Workflow Step System' steps: 'Add Signing Person' (which creates e-signing request line to the person appointed in the form) and 'Sign Document' - the action for e-signing which interacts when triggered with the e-signing request lines. |
| Parameters | Additional parameters. Separate, more detailed guidebook will be created in here: |
| Employee groups objects creation expression | Specific functionality used for resolving the group members for individually responsible for completing or familiarization (trainings, onboarding, ...). |
| Order | Order of the display of the defined class among the others related with the same object type, on root object type definition form. |
| Unique keys to validate | The collection of the keys for the class for controlling the uniqueness of the document of certain class. For example it can be appointed the keys for invoice date and number like: invoiceDate,invoiceNo - for the class 'Purchase Invoice'. Do not use space after coma. For other than uniqueness validation, please use form validators: Validators |
| Date field keys to lock records of the past | Specific setup related with the accounting process of 'period closing'. The keys of date type, specified in here, determine which keys should be used to split between current and old (archive) population of the documents. Old (archive) will be locked for further edit actions. |
| Indexed keys | List of the indexed keys |
| Show button 'Upload file' (Excel) | The definition should be made for the class of the documents which appear as children or related documents in 'relation view' type attribute. Then, in such children type attribute or in 'relation view' type attribute, appears additional button 'Upload file' :
This functionality is used for importing allocation lines for the invoice from excel. |
| Excel export templates | The definition of the templates is placed in Administration -> Templates. It is required to first create the template. In here you are choosing from the list of available templates. Possibility to use excel export templates specified in here. When this option is enabled, then on the form related with the class appears the button: Reports. It has the dropdown list with the assigned templates available. |
| Word export templates | The definition of the templates is placed in Administration -> Templates. It is required to first create the template of MS Word type. In here you are choosing from the list of available templates. Possibility to use excel export templates specified in here. When this option is enabled, then on the form related with the class appears the button: Templates. It has the dropdown list with the assigned templates available. The sections of the document are synchronized automatically while exporting. You can find the example definition of templates in _CORE company. For example; the both syntaxes are correctly resolving the employee first and family name pointed in select type attribute, idenfified by the key employeeId: Custom caption name: {employeeId.name} Custom caption: {employeeId} |
| Save copy to parent | This only works for objects which are used as lines in Children type attribute. This parameter determines whether children lines will be saved to (as the part of) the main document record in database (Save all data) or will not be saved (Don't save). |
-b093c72f77bea8f2faa8fafd266bf373.png)
-0994d41d051125950cc52174e6981ccb.png)
Triggers
The mechanism launched for status change or update of attribute value of documents of certain class. They are used for propagating the change from the main object to related objects.
| Attribute | Description |
|---|---|
| Trigger name | Name of the trigger |
| Trigger type | Status changes - is launched on the change of status of the main document. Keys changed - is launched on the value change of the apponited attributes on the form related with the class. |
| Trigger on | Status changes to - Available for the 'Trigger type'='Status changes', should be sensitive for the changes of the value of status for the listed in here values. Keys changed - Available for the 'Trigger type'='Keys changed'. You should list in here with comma separation the key names of the attributes, which value changes on main document should launch the trigger |
| Also trigger on change initiated manualy | By default triggers are excecuted on triggering them by workflow action or web api method. By checking this option, manual change performed on the document also triggers the mechanism of update. |
| Action | Start workflow - as the result of launching trigger launches the workflow appointed in 'Start workflow' below. Update relations - updates the related objects (by below setup) to the main document. The scope of update is configurable in Params section below. Update documents by expression view - to be updated |
| Start workflow | When 'Action' = 'Start workflow' , launches as result the workflow specified in here |
| Related Object type | When 'Action' = 'Update relations'. This is part of the setup of relation by which system should find destination objects to be changed. You should appoint in here the object type of the destination objects (records) to be changed. |
| Related to Object class | When 'Action' = 'Update relations'. This is part of the setup of relation by which system should find destination objects to be changed. You should appoint in here the class of the destination objects (records) to be changed. |
| Relation key | When 'Action' = 'Update relations'. This is part of the setup of relation by which system should find destination objects to be changed. You should appoint in here key of the lookup attribute which is placed on destination objects (records) form. In this lookup key, on related object form, the main document is appointed. |
| Relation own key | When 'Action' = 'Update relations'. This is part of the setup of relation by which system should find destination objects to be changed. You should appoint in here key from the main document form. Typically you should put in here value: id (see syntax example below), if the destination (related) objects, have on their forms, lookup attribute which appoints directly to the main document (specified in 'Relation key'). PS. Please note that in more complex scenario relation can be defined in such manner that main document by 'Relation own key' appoints to other object. And related objects are appointing to the same other objetct in their 'Relation key'-s. |
| Params | Defines the way the change will be performed on related objects. Typical syntax is presented below. |
Params example:
{
"copyValues":  [{
         "fromKey": "name",
         "toKey": "additionalDescription"
      }],
"updateRelationAttribute": true,
"recalculateExpressions": true
}
"copyValues" - defines from which key in main object to which key in related destination object value should be copied and saved,
"updateRelationAttribute" - this parameter is responsible for the update of the relation attribute on related object form. The common case can be that the name of main document is updated and we expect to update it also on the related objects forms in lookup attribute (in relation key). In such case please use this parameter. This parameter can appear as standalone; so the full syntax of Params will be:
{
"updateRelationAttribute": true
}
"recalculateExpressions" - whether with the change system also should recalculate and save expressions appearing in setup of attributes on related objects' forms.
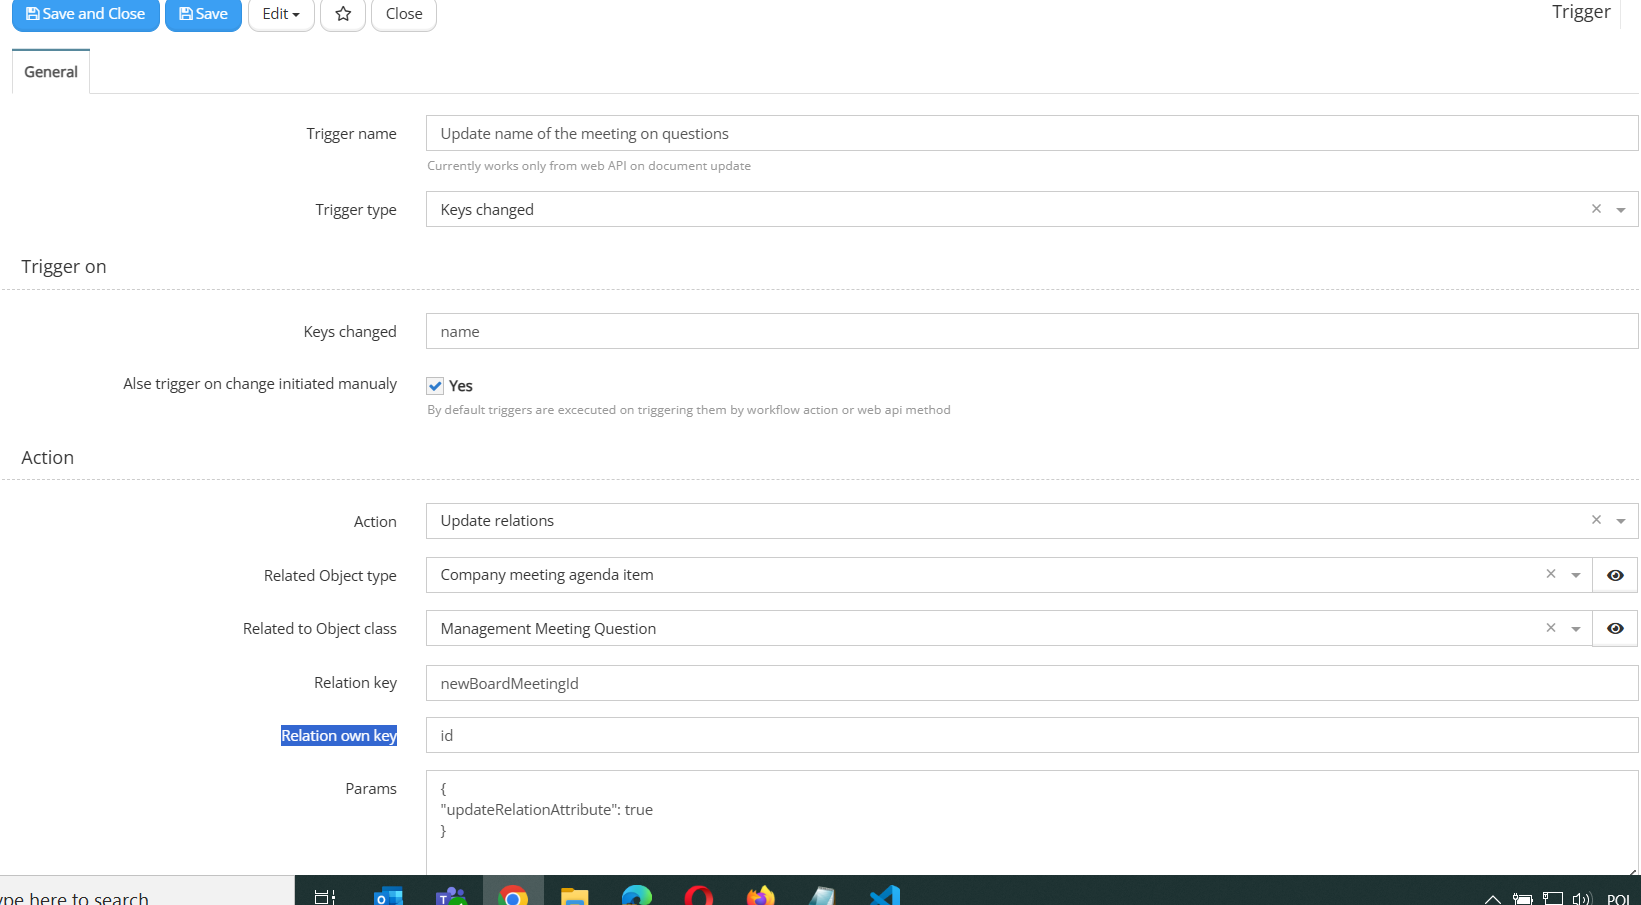
Example of the trigger:
On management meeting form, we have list of the questions (meeting agenda items) in relation view attribute. The relation between question and meeting is setup by lookup attribute (key: newBoardMeetingId) on question form. The scenario is: we would like to propagate the change of the name of the meeting to every related with the meeting question. On the meeting form such tigger has been implemented:
Class Advanced Parameters
Propagation of the changed attributes values to other related documents
Example 1:
This is the example of the usage class parameters. The scenario is:
There is main document (Candidate form). On it's form there are 2 attributes of relation view control type which are displaying related with this candidate documents:
-e97c9f4c8c823ea6173287e5a6f7072e.png)
The set of actions is:
1) Candidate document is created, where attributes multi-select attributes are filled in 'Recruiters' and 'Involved'. Because of this assignment appointed persons will have the access to the created candidate.
2) Related documents are created from the candidate form. On the forms of these documents there is created another pair of the attributes 'Recruiters' and 'Involved' with 'Read only' option, just in order to propagate the security from candidate to related documents. On the form of the related documents the Default value if setup:
For 'Recruiters' as:
[ParentValue]:recruiterIds
and
For 'Involved' as:
[ParentValue]:performsRecruitment
So while creating the related document from the candidate form (through relation view type of control attribute), then Recruiters and Involved are filled in the same manner as on root candidate. So the same security for related documents can be ensured as for root candidate.
3) There is a change of set of Recruiters and Involved on Candidate main document. We would like to automatically provide the same security (for updated set of Recruiters and Involved on candidate form) for all the related documents with the candidate, without opening each related document form and saving (which can be achieved this way, when expression is defined for Recruiters and Involved on related documents forms). The solution for this is define in Parameters (placed in Advanced tab) of the class of candidate root document in the following manner:
{
  "copyValues": {
    "relationKeys": [{
      "relatedDocs": [{
         "fromKey": "performsRecruitment",
         "toKey": "involvedMulti"
      },
     {
         "fromKey": "recruiterIds",
         "toKey": "recruiterIds"
      }],
      "relatedIdsCerts": [{
         "fromKey": "performsRecruitment",
         "toKey": "involvedMulti"
      },
     {
         "fromKey": "recruiterIds",
         "toKey": "recruiterIds"
      }]
    }]
  }
}
On every save of candidate, from candidate will be copied the values of Recruiters and Involved attributes to related view objects (to related documents).
relatedDocs - is the key for relation view attribute (presented on above screenshot under 'Candidate documents')
performsRecruitment - is multi-select type key for Involved attribute on Candidate form
involvedMulti - is multi-select type key for Involved attribute on Candidate document form
recruiterIds - which is placed in "fromKey": "recruiterIds" , is multi-select type key for Recruiters attribute on Candidate form
recruiterIds - which is placed in "toKey": "recruiterIds" , is multi-select type key for Recruiters attribute on Candidate document form

In analogical way attributes are mapped for the following relation view attribute key:
relatedIdsCerts - is the key for relation view attribute (presented on above screenshot under 'Candidate Ids and Certs')
______________________________________
Example 2:
The another example is propagating the changed values from recruitment to the related candidate (Parameters are set up in Recruitment class):
{
  "copyValues": {
    "relationKeys": [{
      "relVieCand2": [{
         "fromKey": "plannedWeek",
         "toKey": "plannedWeek"
      },
     {
         "fromKey": "branchOfDeploy",
         "toKey": "branchOfDeploy"
      },
      {
         "fromKey": "typeEmployId",
         "toKey": "typeEmployId"
      }]
    }]
  }
}
The prerequisite for such scenario is described in: Set the Select type attribute (placed on Candidate form) which appoints to Candidate with the value of the same candidate
How to create Setup data entries
Object type with setup data type allows you to create classificators, i.e. lists of entries that can be used in object forms as predefined options. Examples of classificators are list of leave types, list of contract types, list of business trip types that a user can choose from when creating a document.
You must have administrator rights to be able to create setup data entries.
To create a setup data entry, go to Administration > Setup. The object type with setup data type you've created will be listed here automatically. Open it and select the button for creating a new entry. Edit the required settings and save the entry.
When an entry is created, it will automatically become available in select attributes in object forms.
Facet expressions
Default expression
The default facet expression sets name of an object as its label. It takes the value of an attribute with a key 'name' and uses it as a label.
'${name}'
Other attributes in a facet
You can modify the facet expression to use values of other attributes or add more information to the label.
To use the author of an object as a label, enter:
'${employee}'
This expression will take values of two attributes to build a label:
'${employee}, ${typeOfDocument}'
For a child object, you can use the facet expression of a parent object:
'${parentId._facet}'
An expression that combines several values and gives a detailed info about an object in the label:
BT: ${employeeId}| to: ${countriesList} | dates ${dateBtFrom}-${dateBtTo}
How to setup date in a facet
var date = new Date('${expirationDate}');
var month = '' + (date.getMonth() + 1);
var day = '' + date.getDate();
var year = date.getFullYear();

if (month.length < 2) {
    month = '0' + month;
}
if (day.length < 2) {
   day = '0' + day;
}

var dateString = [year, month, day].join('-');

return '${employee}, Due Date: ' + dateString;
How to setup date from and to in a facet
var dateFrom = new Date('${dateFrom}');
var monthFrom = '' + (dateFrom.getMonth() + 1);
var dayFrom = '' + dateFrom.getDate();
var yearFrom = dateFrom.getFullYear();

if (monthFrom.length < 2) {
    monthFrom = '0' + monthFrom;
}
if (dayFrom.length < 2) {
   dayFrom = '0' + dayFrom;
}

var dateTo = new Date('${dateTo}');
var monthTo = '' + (dateTo.getMonth() + 1);
var dayTo = '' + dateTo.getDate();
var yearTo = dateTo.getFullYear();

if (monthTo.length < 2) {
    monthTo = '0' + monthTo;
}
if (dayTo.length < 2) {
   dayTo = '0' + dayTo;
}

var dateStringFrom = [yearFrom, monthFrom, dayFrom].join('-');
var dateStringTo = [yearTo, monthTo, dayTo].join('-');

return '${employee}, '+dateStringFrom + ' to ' + dateStringTo + ('${comment}' ? ', Comment: ${comment}' : '');
How to set up a condition in a facet
return '${employee}, ' + ('${comment}' ? ', Comment: ${comment}' : '');
Object Type Class Ledger setup
Ledger split keys are keys used to identify date. Examples:
"dataRange"
dateFrom, dateTo
"Ledger keys" examples
employee=>person,datesRange=>fromTo
employee=>person,dateFrom=>from,dateTo=>to